
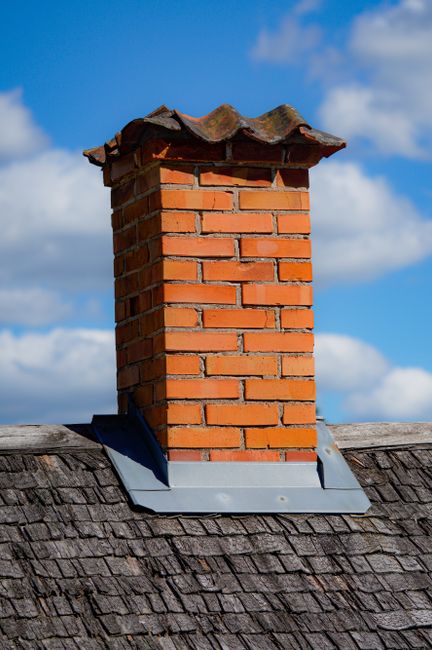
Roof flashing is the material used to direct water away from vulnerable points on a roof. It is commonly made from corrosion-resistant metal, though some roof systems use flexible membranes or molded components. Flashing helps protect places where shingles, roof planes, walls, chimneys, vents, skylights, and gutters meet.
For homeowners in Liverpool, NY, flashing matters because a roof must handle rain, snow, freeze-thaw cycles, wind-driven moisture, and ice that can collect near the eaves. A small weakness in flashing can allow water into areas that are difficult to see until staining, mold, rot, or damaged insulation appears.
What does roof flashing do?
Roofing materials shed most water down the slope, but water does not always travel in a straight line. It can move sideways at roof edges, collect in valleys, back up beneath shingles, or follow the joints where a roof meets a wall.
Flashing creates a controlled path for that water. Instead of allowing moisture to enter a seam or opening, it redirects runoff onto the roof surface, into a gutter, or away from the wall.
A properly installed flashing system works together with shingles, underlayment, ice-barrier membrane, siding, and drainage components. Flashing by itself is not a substitute for sound roofing materials or proper roof design.
Where is flashing installed?
Flashing is needed anywhere a roof changes direction, meets another building material, or contains an opening. Common locations include:
- Roof-to-wall intersections
- Chimneys and masonry features
- Plumbing vent pipes
- Skylights
- Valleys where two roof slopes meet
- Roof edges and eaves
- Rakes along the sloped edges of a roof
- Dormers and other raised roof sections
- Areas where a lower roof meets an upper wall
- Transitions around exterior structures or additions
New York’s residential building requirements recognize roof-to-wall intersections, changes in roof slope or direction, and roof openings as locations that need flashing or equivalent water-management details.
What are the main types of roof flashing?
Different roof locations need different flashing designs. The names can be confusing because several pieces may work together in one area.
Step flashing
Step flashing consists of short pieces of metal installed in overlapping layers where a roof slope meets a sidewall. Each piece works with a course of shingles so water is directed down the roof rather than into the wall.
This detail is especially important around dormers, sidewalls, and additions. If step flashing is missing, bent, reused improperly, or covered by siding in the wrong way, moisture may enter the wall cavity.
Counterflashing
Counterflashing is installed over or in front of base flashing, often at a chimney or masonry wall. It helps prevent water from passing behind the flashing assembly.
At a chimney, base flashing and counterflashing usually need to be integrated with both the roof covering and the masonry. Sealant alone is not a reliable replacement for a properly designed flashing detail.
Kick-out flashing
Kick-out flashing appears where a sloped roof meets a vertical wall near the end of a gutter or wall run. Its purpose is to push water away from the wall and into the gutter or beyond the edge of the building.
Without this small but important component, concentrated runoff can soak siding and trim. Damage may appear lower on the wall than the actual flashing problem.
Valley flashing
Roof valleys collect water from two slopes, making them one of the most heavily used drainage areas on a roof. Some valleys use exposed metal, while others are formed with layered underlayment and shingles.
Leaves, branches, ice, and roofing debris can interfere with valley drainage. A valley that looks acceptable from the ground may still have problems beneath the shingles.
Drip edge flashing
Drip edge is installed along roof edges to help guide water away from the fascia and into the gutter or away from the building. It also helps protect the edge of the roof deck from repeated wetting.
The relationship between drip edge, underlayment, shingles, and gutters matters. Installing one component incorrectly can cause water to move behind the fascia instead of away from it.
Why is flashing especially important in a cold-weather climate?
Snow and ice create conditions that are different from ordinary rainfall. When snow melts on a roof and refreezes near colder eaves, an ice dam can form. Water may then back up beneath shingles and reach areas that normally remain dry.
An ice-barrier membrane is often used near eaves and in other vulnerable areas as part of the roof’s moisture-control system. It does not replace metal flashing, but it provides an additional layer of protection beneath the roof covering.
Freeze-thaw cycles can also expand small gaps, loosen fasteners, crack sealants, and move materials slightly. Repeated exposure may turn a minor flashing defect into a leak. Heavy snow, falling branches, and spring debris can create additional stress.
What does flashing damage look like?
Flashing problems do not always produce an obvious ceiling leak. Water may travel along rafters, roof decking, insulation, or wall framing before becoming visible.
Signs that may point to a flashing issue include:
- Brown or yellow ceiling stains near a wall, chimney, or roof opening
- Damp insulation in the attic
- Peeling paint or swollen trim near an upper wall
- Darkened wood around a chimney or roof penetration
- Rust, corrosion, or separated metal
- Missing or lifted pieces near roof edges
- Water stains that appear after wind-driven rain
- Repeated leaks in the same location after roof repairs
- Mold-like odors or unexplained dampness in an attic
A leak may show up several feet away from the actual entry point. For that reason, applying roofing cement to the visible interior stain may conceal the symptom without correcting the source.
Can roof flashing be repaired without replacing the roof?
Sometimes. If the roof covering is generally sound and the problem is limited to a damaged section, a repair may be possible. The correct approach depends on how the flashing is integrated with shingles, underlayment, siding, masonry, or a roof opening.
A proper repair may require removing nearby roofing materials, replacing deteriorated metal, correcting the drainage path, and reinstalling overlapping layers in the right order. Simply adding caulk over old flashing is often temporary because sealants can shrink, crack, or lose adhesion.
If flashing has failed in several locations, the roof is near the end of its service life, or the surrounding decking is damaged, a larger repair may be more appropriate.
What should homeowners check from the ground?
Roof inspections involve fall hazards, especially when surfaces are wet, icy, steep, or covered with debris. From the ground, residents can still look for useful clues:
- Missing shingles near walls or roof openings
- Metal pieces that appear bent or detached
- Rust-colored streaks below flashing
- Sagging gutters or water spilling behind them
- Damaged siding below roof-to-wall intersections
- Debris collecting in valleys
- Unusual staining around chimney areas
- Shingle edges that appear lifted after wind or winter weather
Inside the attic, moisture stains, damp insulation, daylight around penetrations, or softened wood may indicate that water management is failing. Safety should take priority over close visual inspection from a ladder or roof surface.
Roof flashing is easy to overlook because much of it is hidden beneath shingles, siding, or masonry. Yet these small components often determine whether rain and melting snow leave the roof safely or enter the structure. Understanding where flashing belongs and what problems look like can help Liverpool residents recognize moisture issues before they spread into ceilings, walls, insulation, or framing.